Out of Stock of Products
Keeping our lawn in perfect condition can be an arduous and exhausting task, but thanks to technology, we can do it easier and more efficiently.
Robotic lawnmowers are a wonderful tool that helps us keep our lawn in perfect condition without having to do all the work manually.
In this guide, we will show you how to replace the blades on your robotic lawnmower quickly and easily so you can continue enjoying a pristine lawn.
To start, it is important to have the best blades To replace the previous ones, prepare the necessary instruments, such as gloves and protective glasses, before lifting the robotic lawnmower and turning it over to locate the blades.
Once located, we remove the old blades and clean the area before installing the new blades. Finally, we check and test the robot before putting it back into operation.
In short, replacing the blades on your robotic lawnmower is an easy and simple task that you can do yourself at home.
Preparation of instruments
Before starting to replace the robotic lawnmower blades, it is important to have all the necessary tools at hand. For this job, we will need a wrench, safety gloves and the specific replacement blades for our robotic lawnmower model. It is also important to disconnect power to the mower before beginning any maintenance work. In addition, we recommend having a screwdriver, flat or star screwdriver, crowbar and dishwasher brush on hand if necessary.
Use gloves and protective glasses
To ensure safety when handling blades, it is essential to use gloves and protective glasses. In this way, we avoid cuts and eye injuries. We should not underestimate the importance of these security elements.
Lift the robotic lawnmower and locate the blades
When it comes to changing the blades on a robotic lawnmower, the first step is to locate them. In most models, the blades are located under the main housing. To access them, it is necessary to lift the robotic lawnmower and turn it over.
It is important to note that this operation must be carried out carefully and on a safe and stable surface. Once the robot is in position, you can access the blades and proceed to change them.
There are different options for replacement blades for lawnmower robots on the market. It is important to choose quality blades that are compatible with the model of our robot. Titanium blades for robotic lawnmowers are a good option, as they are resistant and allow a precise and long-lasting cut.
At Domar, we are specialists in spare parts for lawnmower robots. Our titanium-coated stainless steel blades are compatible with the most popular models from manufacturers Husqvarna Automower, Gardena and Yardforce. In addition, we offer a satisfaction guarantee, so if you are not satisfied with our blades, we will refund your purchase price.
In short, to change the blades on a robotic lawnmower, you need to lift it up and turn it over to access the blades. It is important to carry out this operation carefully and on a safe and stable surface. In addition, it is advisable to choose quality blades compatible with our robot model to ensure a precise and long-lasting cut.
Remove old blades
To replace the old blades on our lawn mower, we need a wrench to loosen the screws that hold them. Once the screws are loose, we carefully remove the old blades, remembering their position and how they were positioned before removing them. This will help us install the new blades correctly. It is important to note that the blades must be compatible with our lawn mower model.
Cleaning the blade area
Before installing the new blades, it is important to clean the area where they are located to avoid obstructions in their operation. During the replacement process, we take the opportunity to remove any accumulation of dirt, dirt, debris or sand that may be in the area. To do this, we use a brush or cloth to clean the protective plate and the dirt under it. It is also important to keep in mind that some fertilizers can corrode the blades, so it is necessary to clean the area properly to prevent deterioration.
Install the new blades
To change the cutting blades on your blade model, follow this step-by-step guide. Make sure you have the original blades and screws or compatible replacement blades.
- Replace the blades: Place the new blades in their corresponding position, making sure they are well aligned.
- Tighten the screws: Replace the screws and tighten them securely, following the manufacturer's recommendations for the torque needed to tighten the screws.
- Blade Compatibility: Use Husqvarna Automower® Endurance or Husqvarna Endurance HSS blades as they are stainless steel and offer long life.
Remember that it is important to change blades regularly to maintain a precise and efficient cut on your lawn.
Out of Stock of Products
Verification and testing
Once we have installed the new blades, it is essential to check that they are correctly adjusted and aligned. To do this, we manually rotate the blades to ensure that there are no obstructions and that they can rotate smoothly. If we detect any problems, it is important to review the instructions and verify that everything is correctly installed. We should not mow the grass without doing these checks, as we could cause irreparable damage to the performance and appearance of the grass.
Start the robot again
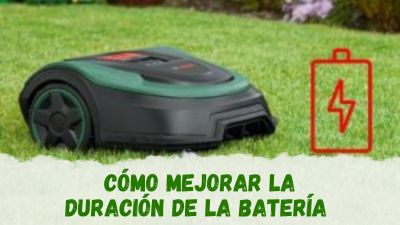
Once we have verified that the new blades are correctly installed, it is important to ensure that all the cables are securely connected and turn on the main switch to start the robotic lawnmower. Before starting mowing work, it is advisable to carry out a brief test to observe the operation of the new blades and make sure that they are cutting the grass correctly. Additionally, it is important to take into account the operating time, the battery life of the robotic lawnmower and the need to recharge it at the charging station. It is also advisable to check the condition of the perimeter cable before starting work. With these steps, our robotic lawnmower will be ready to work effectively and efficiently.
Conclusion: Changing the Blades of your Robotic Lawnmower is Simple
In conclusion, the process of replacing the blades on your robotic lawnmower is a simple task that should not take much time. Although it is essential for the good maintenance of the robot, there is no need to worry, since by following the appropriate steps and taking the necessary precautions, you will be able to do it without problems.
It is important to carry out this maintenance regularly and be clear What is the approximate lifespan of the blades?, to ensure that your lawnmower is in optimal condition and continues to efficiently cut the grass in your garden. In addition, changing the blades regularly increases the life of your robotic lawnmower and ensures its durability.
In short, changing the blades on your robotic lawnmower is not only easy, but also has great benefits for its quality and lifespan.
Out of Stock of Products
Some content on this page comes from Amazon. The prices and availability of their products are constantly changing and are updated every 24 hours. The price and availability that appears on Amazon at the time of purchase will apply to the purchase of the product.